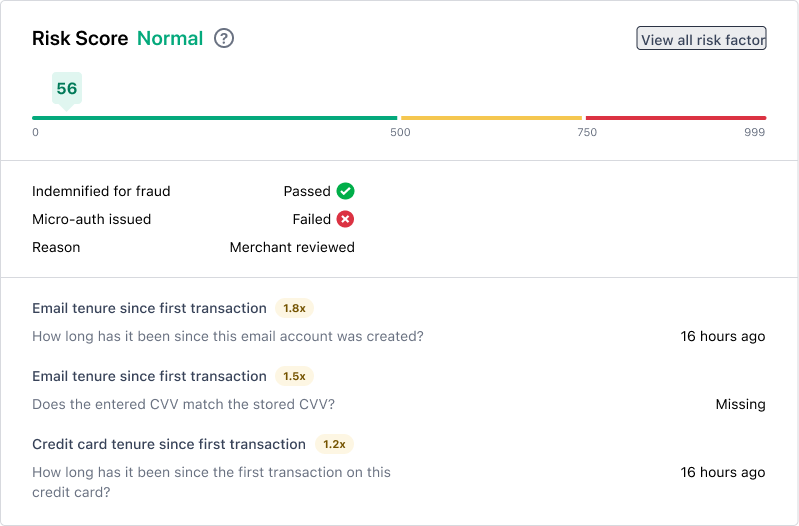
Merchants can examine their transaction feed to gather information about its status, shopper, and why it was or was not approved. This guide applies information found in the View Order Rejection Reasons guide and the Fraud Review Process reference article to real-world scenarios.
Scenarios
Determine if a Shopper has been Blocklisted
When a shopper is blocklisted (banned), their orders are updated to the Permanently Rejected status without any notifications being sent to your support team or administrators. Your team can verify a shopper has been blocklisted by reviewing their transaction history.
- Log in to the Merchant Dashboard.
- Navigate to Transactions.
- Locate the transaction you are investigating.
- Select the transaction to open the transaction details page.
- Copy the shopper’s email address and close the transaction details.
- Paste the shopper’s email address in the search bar.
- Select Status and enable the following filters:
- Failed Authorization
or - Permanently Rejected
- Failed Authorization
- Scroll through the shopper’s transaction history until you find the most recently failed transaction.
- Select the
Failedtransaction to open its details. - Review the transaction’s rejection Reason in the Risk Score section.
If the message includes specific information about the failure, such as designating the card as a Lost/Stolen Card, it is likely that the shopper has been blocklisted by Bolt. Using a lost/stolen card automatically blocklists the user for future transactions and explains why you are seeing Permanently Rejected orders for this shopper without any extra notifications or steps.
Lost/Stolen Card Example

