
Bolt understands the importance of protecting your shopper’s information while providing a smooth onboarding experience. Because of this, all account upgrades are handled directly by our expert internal team to ensure:
- Account information is exported securely
- All login workflows are properly accounted for, upgraded, and tested
- The brand experience of SSO accounts aligns with your store
NOTE
Bolt only adds shopper accounts that are net-new to the Bolt Network. Accounts must have a unique phone, email, and merchant id to be considered net-new.
Step 1: Map All Login Workflows
Step through your storefront’s main pages and create a list of all login and registration buttons (and links). We recommend checking both as an end user via your storefront and as an admin via your theme files. You can compile this list as a series series of screenshots, a text document, or a spreadsheet.
After you have completed this list, submit it to your Bolt Customer Success Manager.
TIP
If possible, try to include the element names of these buttons so the Bolt team can quickly find them across your theme files.
Step 2: Choose Checkout or Direct API Setup
- For direct API integrations, follow this walkthrough.
- For Bolt Checkout Plugin integrations, continue to step 3.
Step 3: Upgrade Your Bolt Plugin
While your team is accounting for all login and registration workflows across your storefront, you can begin updating your Bolt plugin to the latest version. This ensures compatibility with all SSO-related features while also giving you the latest and greatest Bolt has to offer.
- BigCommerce: Upgrades are automatic
- Magento Commerce: Must be at least 2.21.1 or greater
- Salesforce CC: Must be 21.4.0 or greater
Step 4: Grant Bolt Access
Bolt’s internal team needs access to your platform’s staging and production environments to complete the following actions:
- Account conversion
- Script and Button replacements
- Theme styling
- Testing
Access to BigCommerce
- Log in to BigCommerce.
- Navigate to Apps > Bolt Checkout.
- Accept the following permissions request from Bolt:
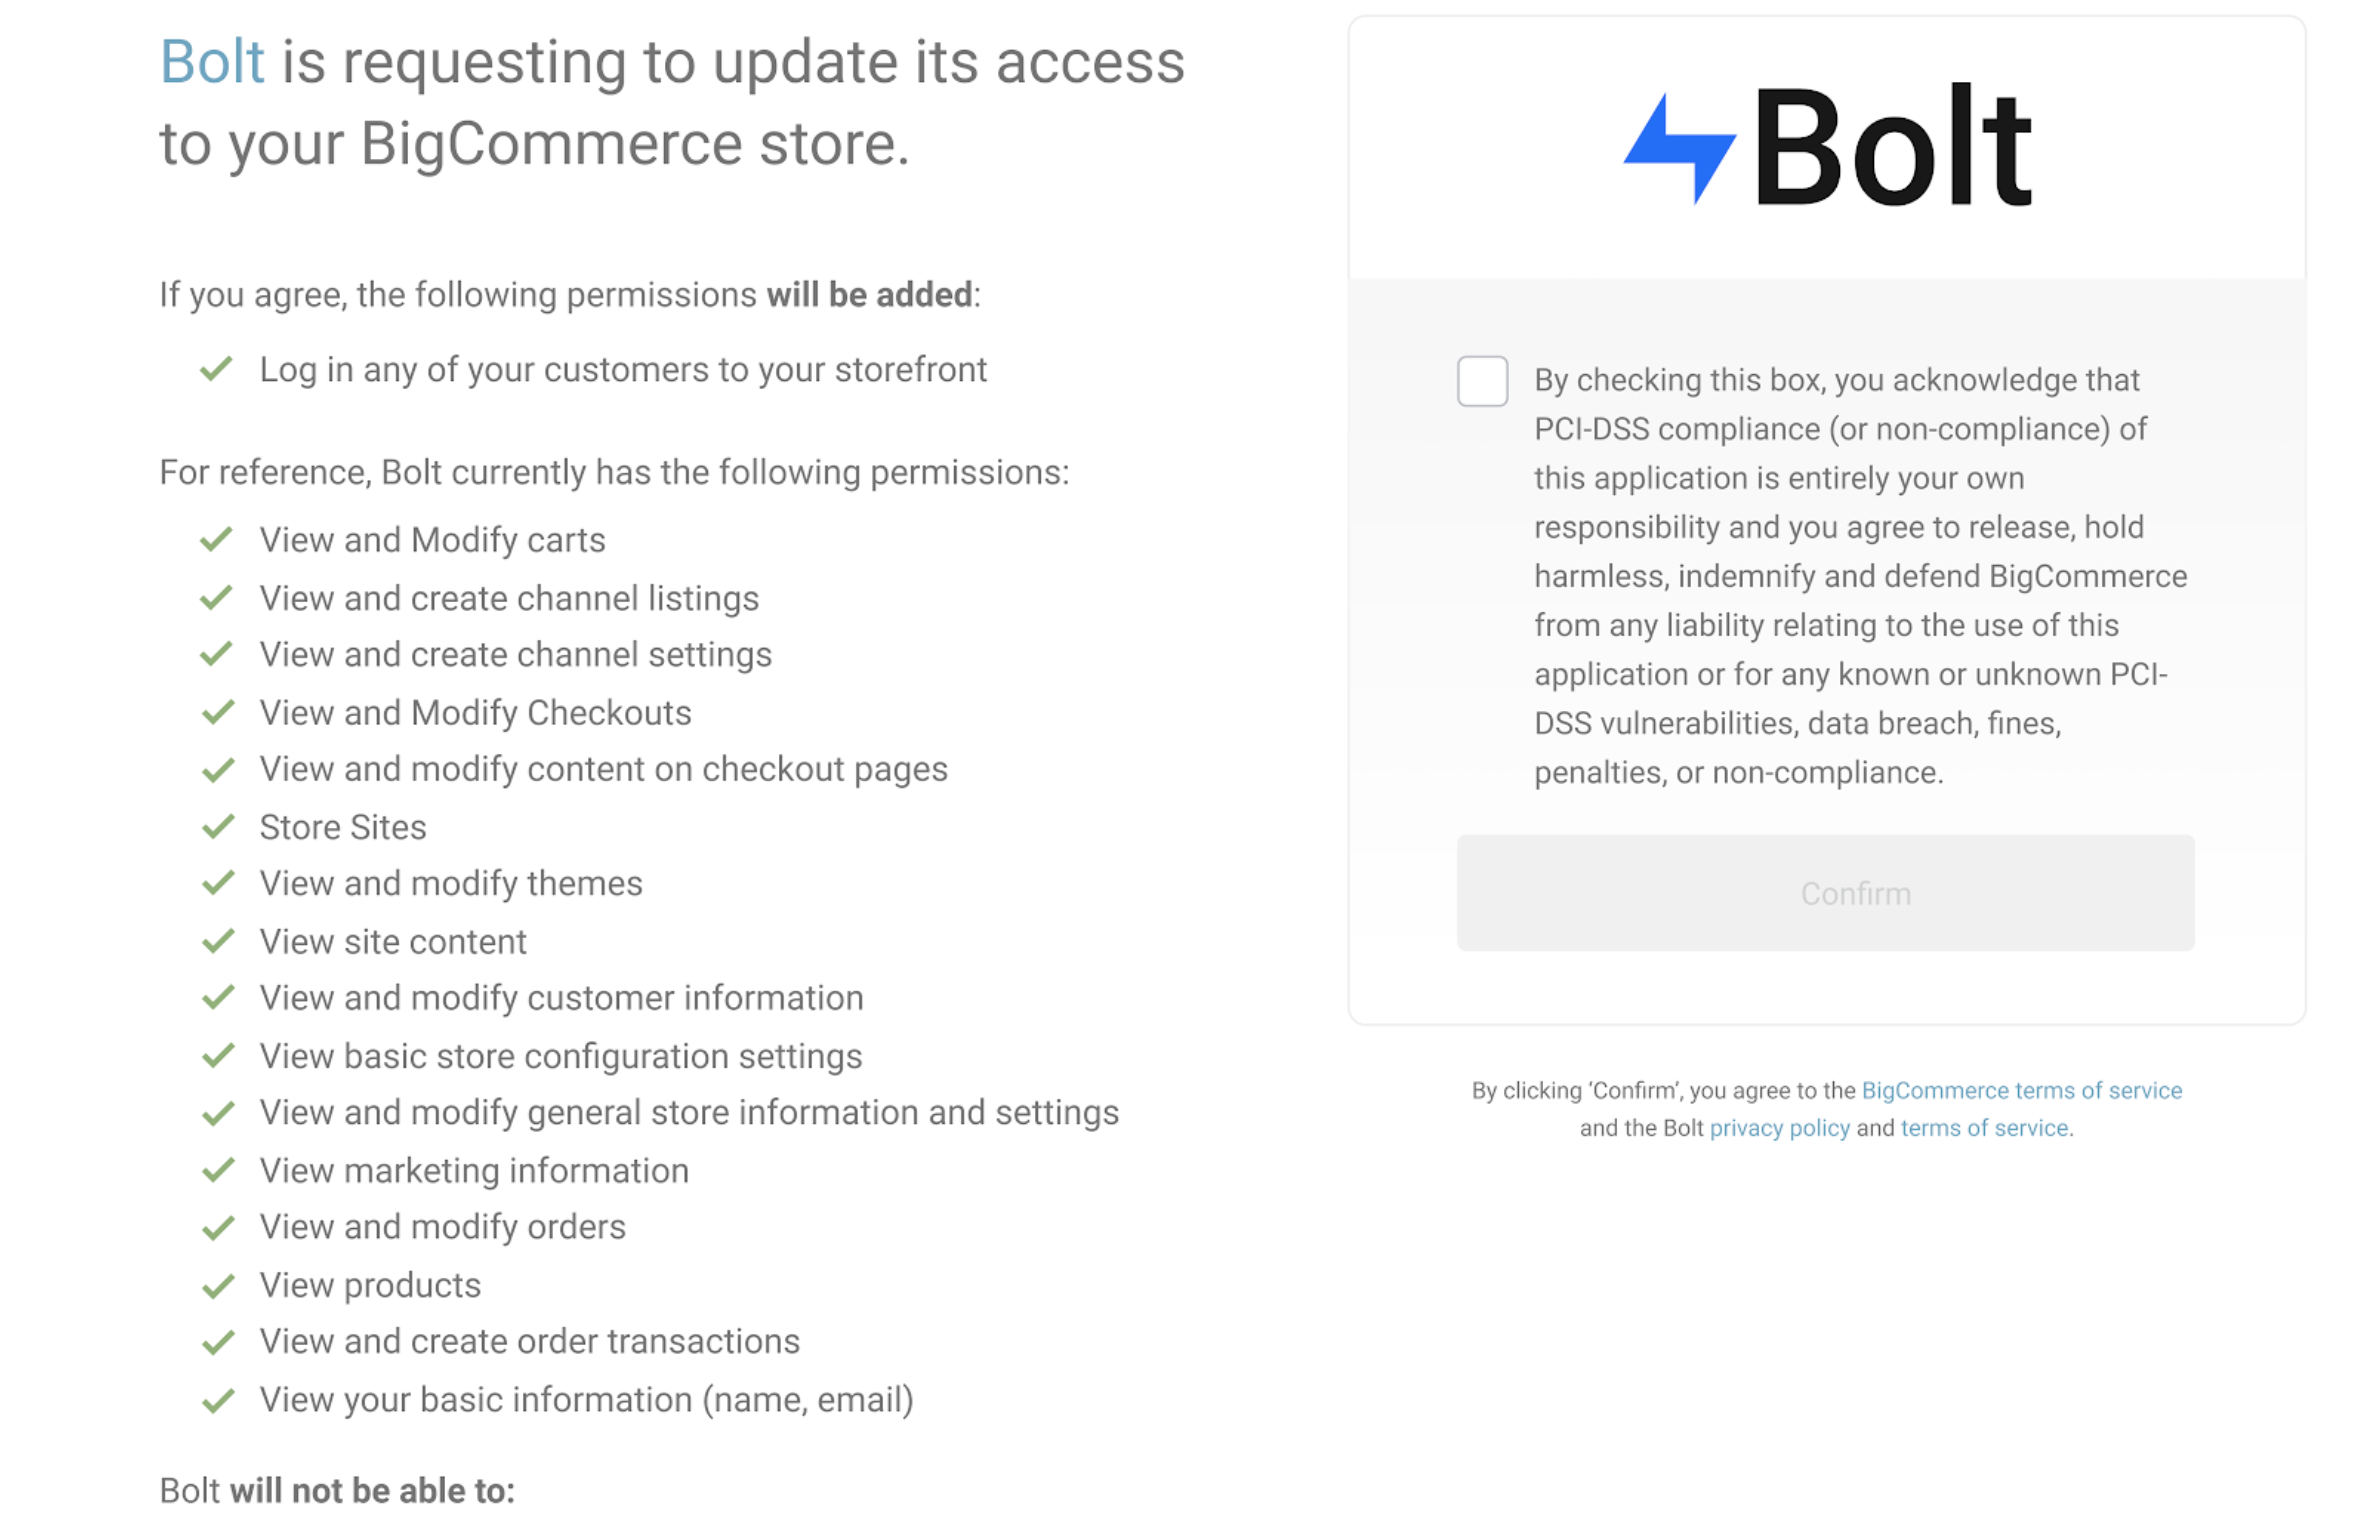
- Notify your Customer Success Representative that access has been granted to the Bolt team.
Step 5: Migrate eCommerce Platform Accounts (Optional)
Migrate existing customer accounts (available for Magento 2 / Adobe Commerce and BigCommerce merchants).
Step 6: Review the Implementation
After Bolt has completed setup, it’s time for you to review the SSO experience and prepare for go-live.
TIP
At this stage, it’s not a bad idea to notify shoppers about their account experience update via email or a storefront banner announcement. Once Bolt SSO is live, shoppers are prompted to link their original store account to a new Bolt account.
Data Integrity
When dealing with shopper accounts, it is extremely important to ensure data integrity and security. Bolt recommends using the following guidelines when reviewing your SSO Commerce implementation:
- Ensure that you are using a new Bolt Publishable Key whenever you:
- Set up a new storefront.
- Export shoppers from one store and import them into another.
- Ensure shoppers cannot change their email from the storefront’s platform. This email is a key used to identify your shoppers and associate them to their Bolt account. If you receive a support ticket from a shopper requesting to update their account’s email address, forward the request to support@bolt.com.
- Do not make any direct changes to the storefront account IDs.
- Magento Only: Do not modify the External Customer Entity table that Bolt has added.
SSO Commerce Testing
Devices associated with merchant dashboard logins are prevented, by default, from logging into or creating Bolt accounts on your storefront. You can update this setting to DISABLED while testing SSO Commerce. After you are done testing, Bolt recommends re-enabling device management for maximum backoffice order indemnification coverage.
Customizations
NOTE
Customizations are available for any links or buttons that may appear on your site or store. However, customizations are not available for the SSO Login modal itself.
The following text and color settings can be customized to align with your brand:
| Customization | Variable(s) | Default |
|---|---|---|
| Bolt Logo Color | -bolt-account-sso-logo-color |
$black (#181C18) |
| Button Text Color | -bolt-account-sso-text-color |
$black (#181C18) |
| Button Text Font | -bolt-account-sso-font |
$system-font-family (-apple-system, system-ui, BlinkMacSystemFont, "Segoe UI", Roboto, "Helvetica Neue", Arial, sans-serif;) |
| Bolt Logo & Text Color | -bolt-account-sso-color |
$black (#181C18) |
NOTE
Both the text (--bolt-account-sso-text-color) and logo color (--bolt-account-sso-logo-color) take precedence over --bolt-account-sso-color.