
To connect Checkout Everywhere with BigCommerce, create an API account specifically for Bolt in BigCommerce. The instructions below walk you through this process and explain how to enter the required information in your Bolt Merchant Dashboard.
Before You Start
This guide assumes you have already signed up for Checkout Everywhere or Bolt Checkout via the Bolt onboarding form. If you have not, create a Bolt Merchant account or complete the onboarding process first.
Step 1: Create an API account in BigCommerce
-
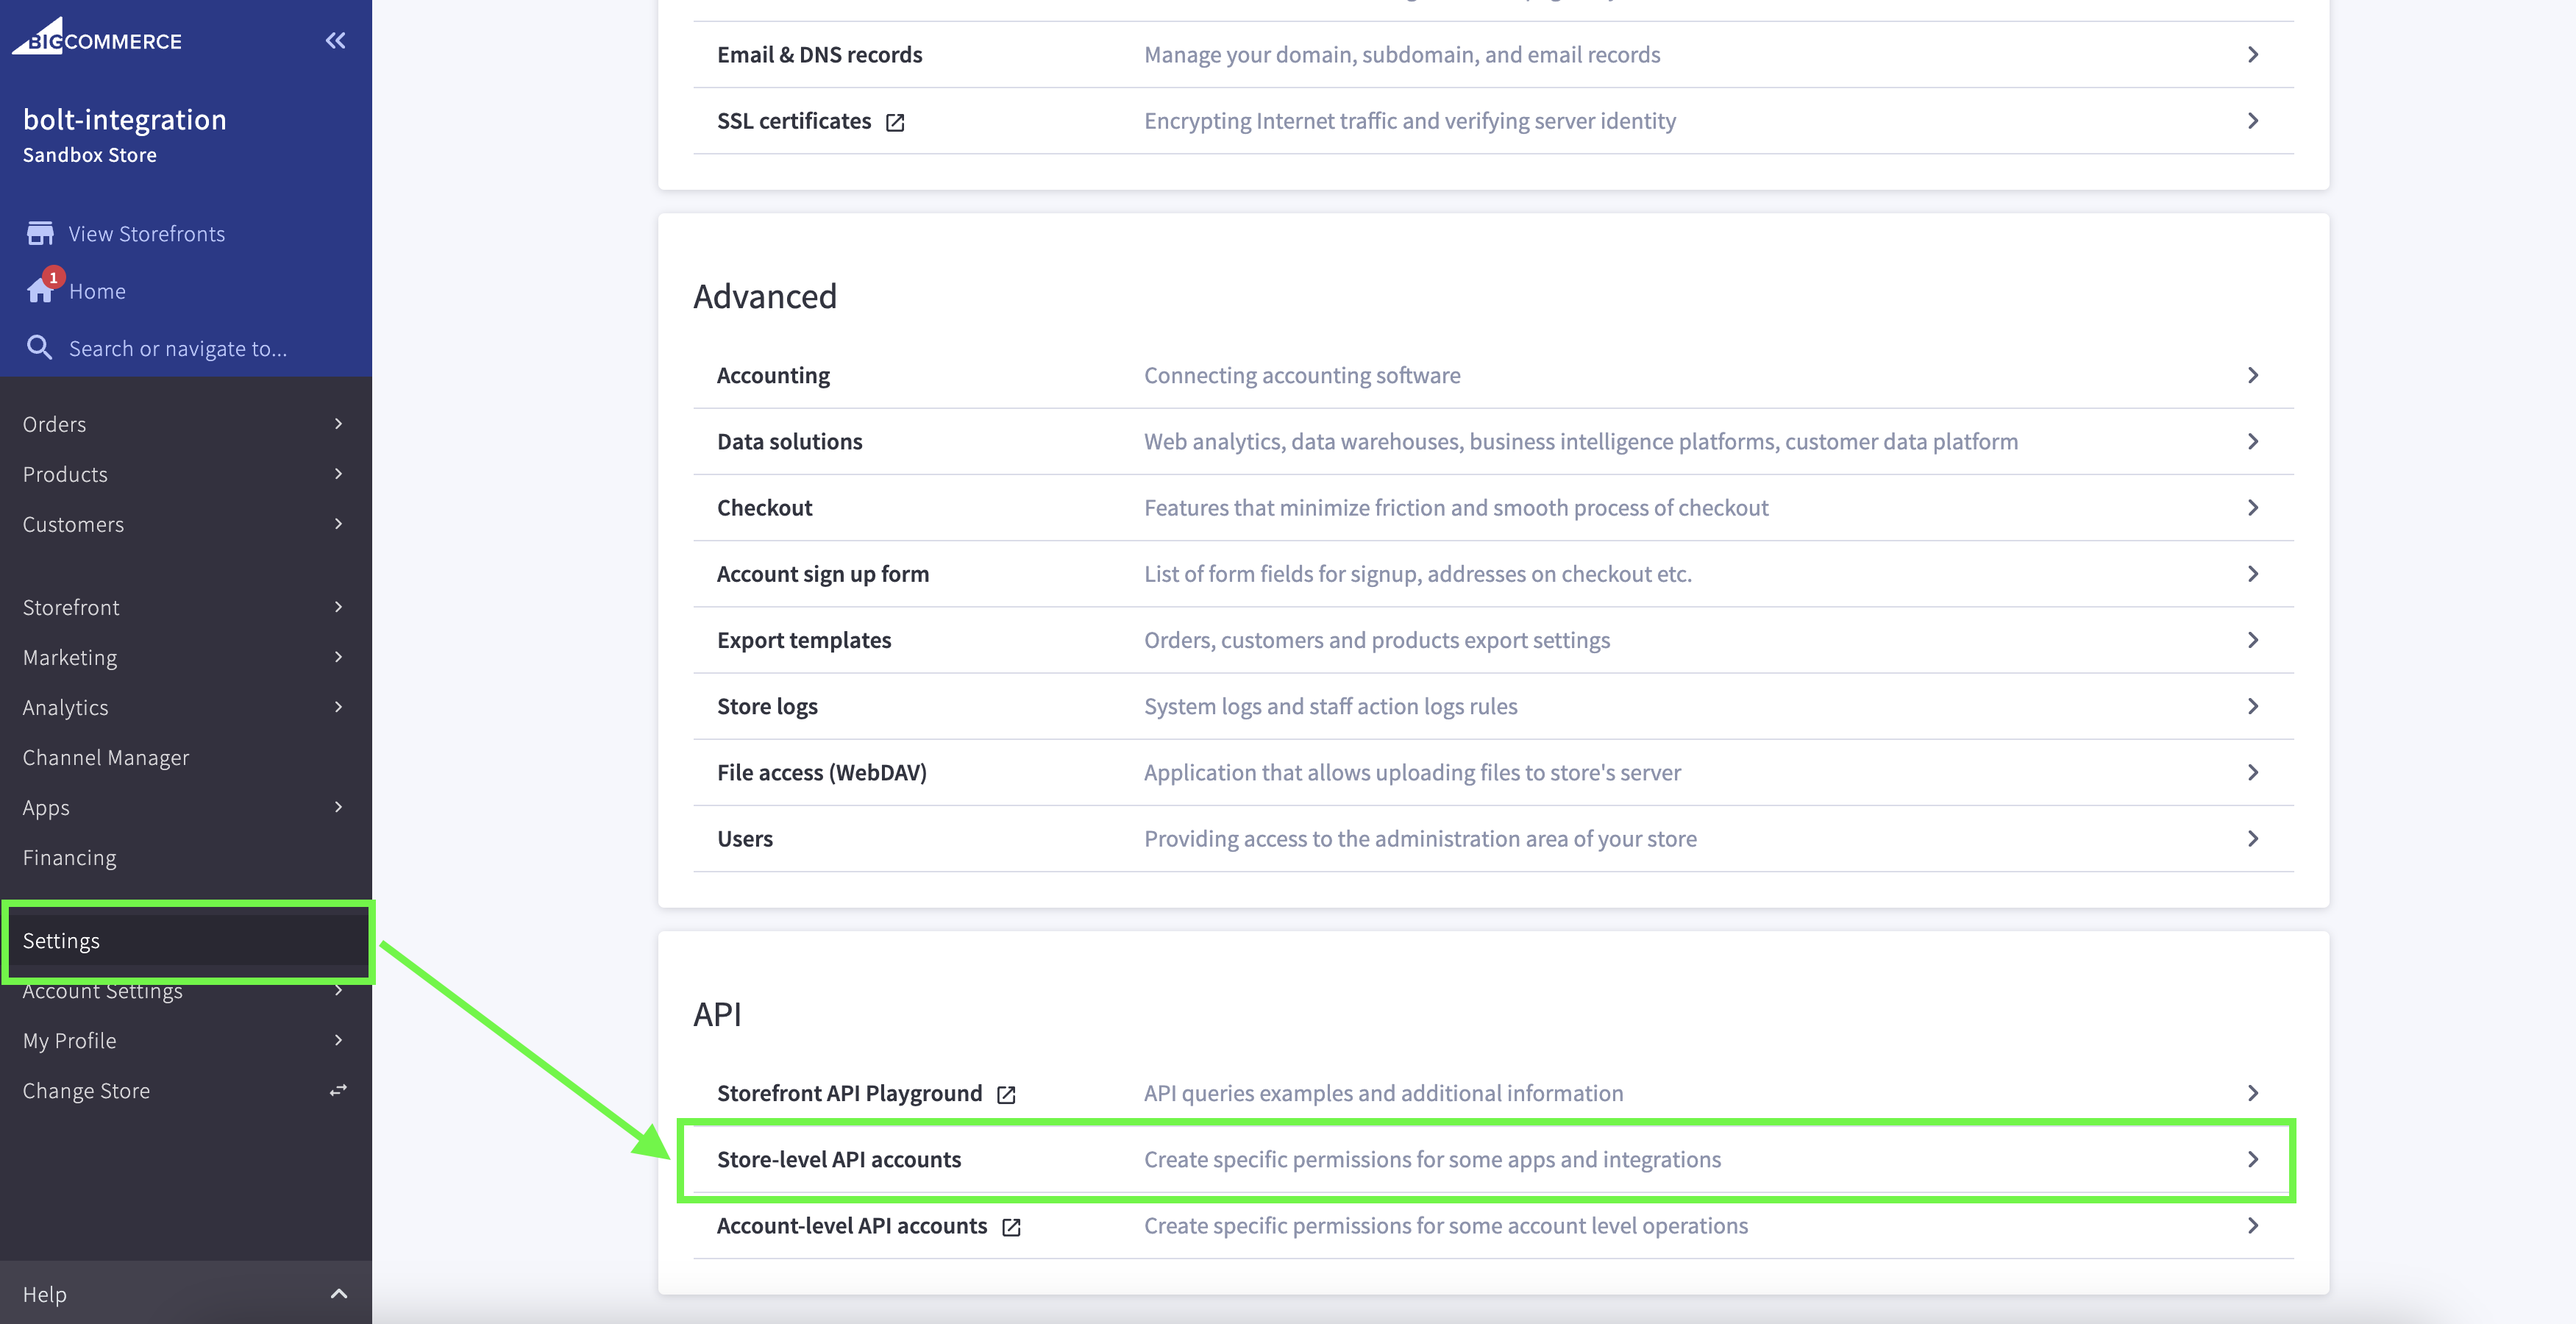
Go to Settings in your BigCommerce account.
-
Click on Store-level API accounts.
-
Click on Create API Account.

-
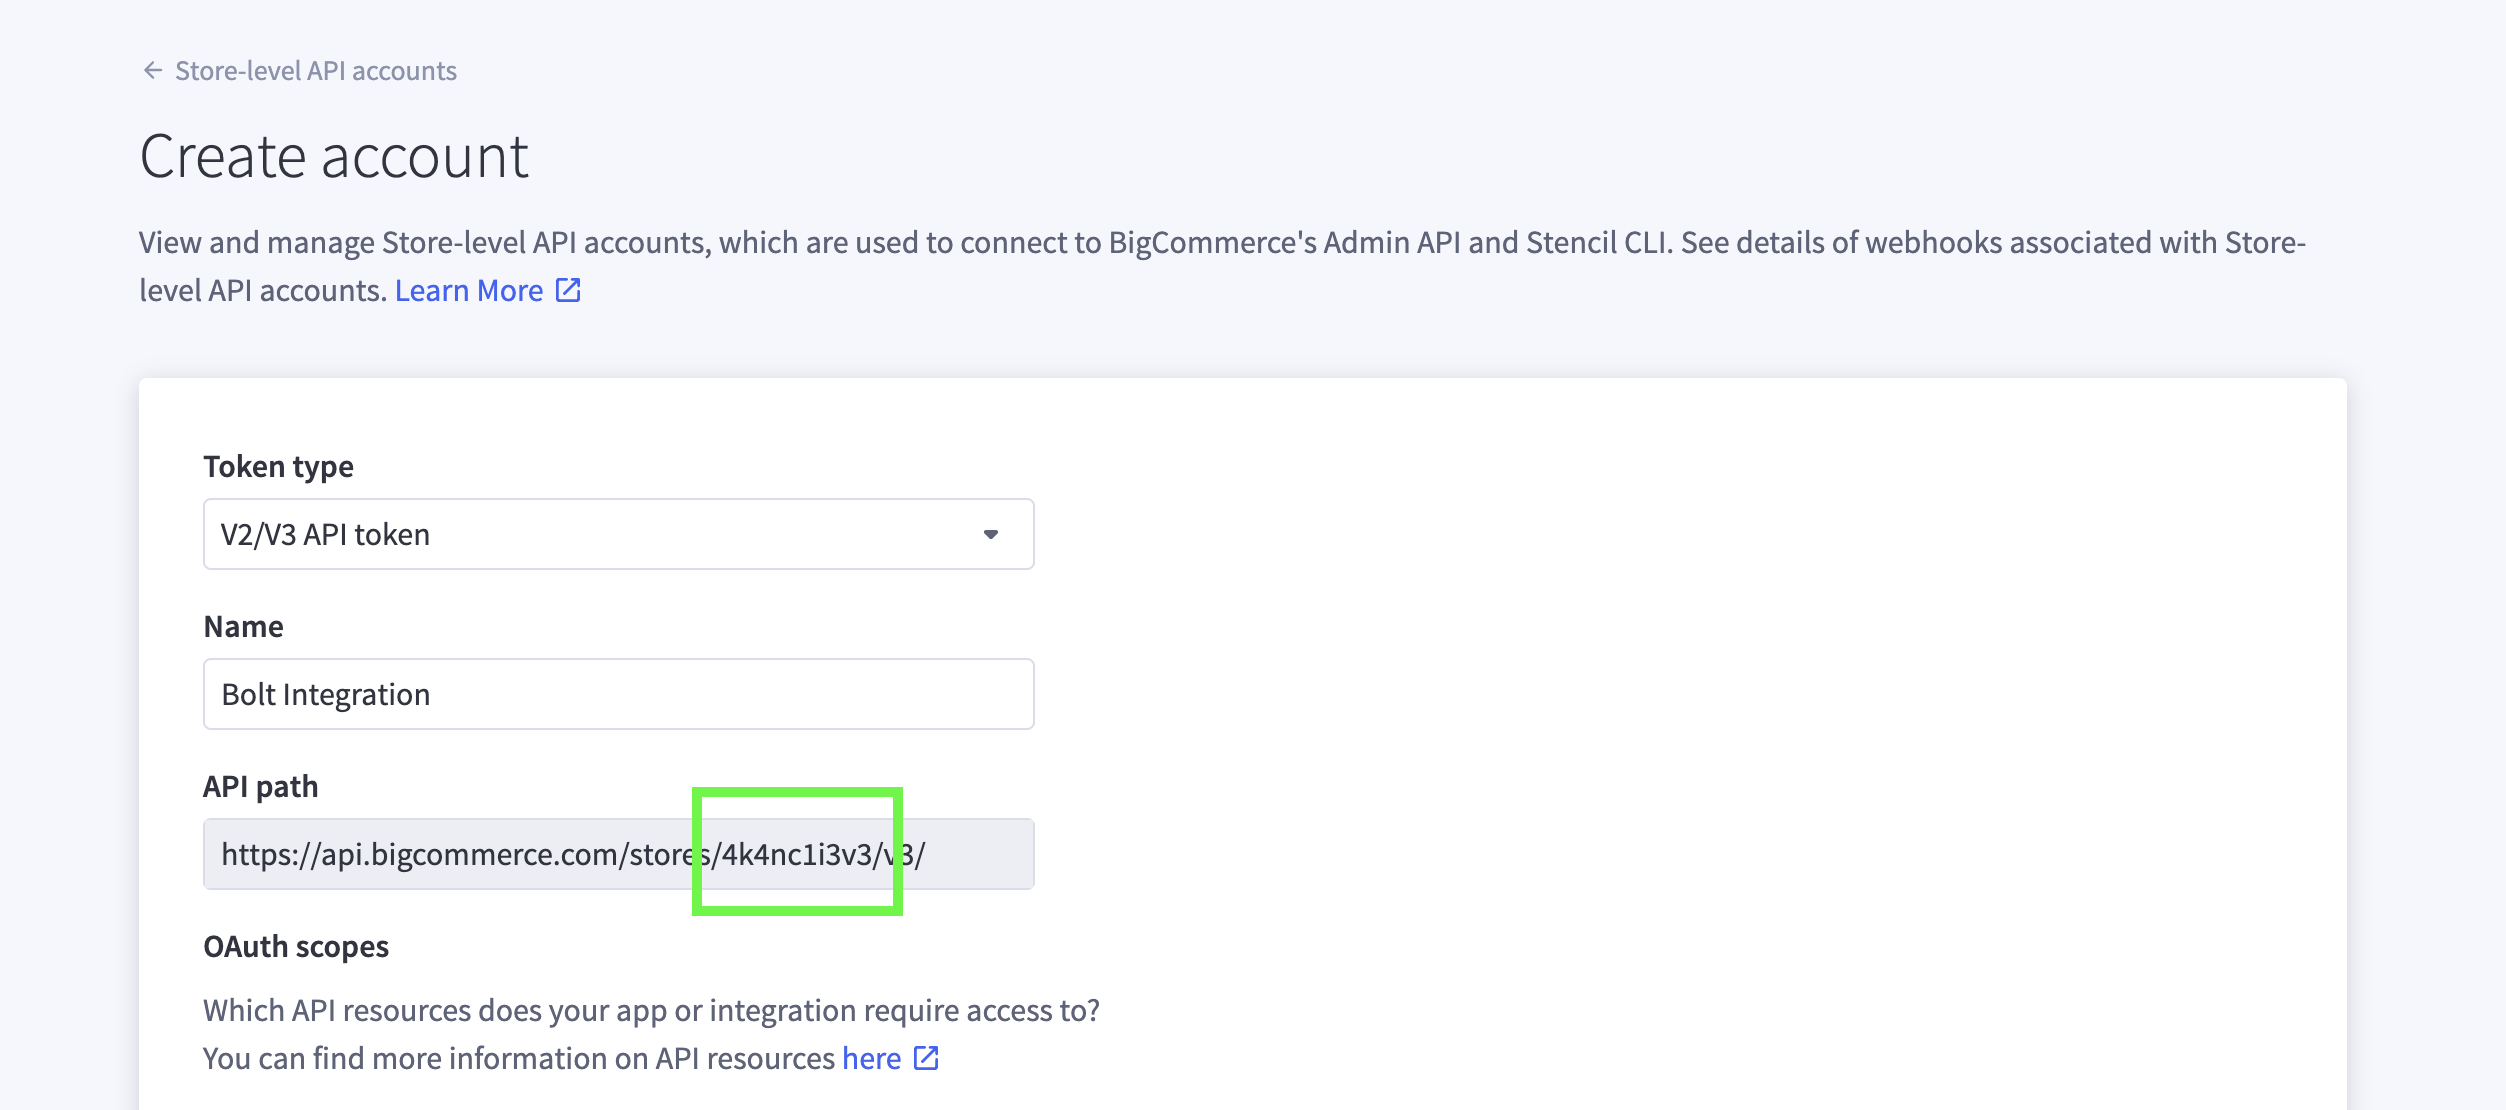
Create an API Account with the appropriate scopes.
- Select the V2/V3 API Token type.
- Provide a name for the API token.
- Set the following scopes: Carts: modify, Orders: modify and Products: read-only.
- Save the store hash, you will need it later in the Merchant Dashboard.
-
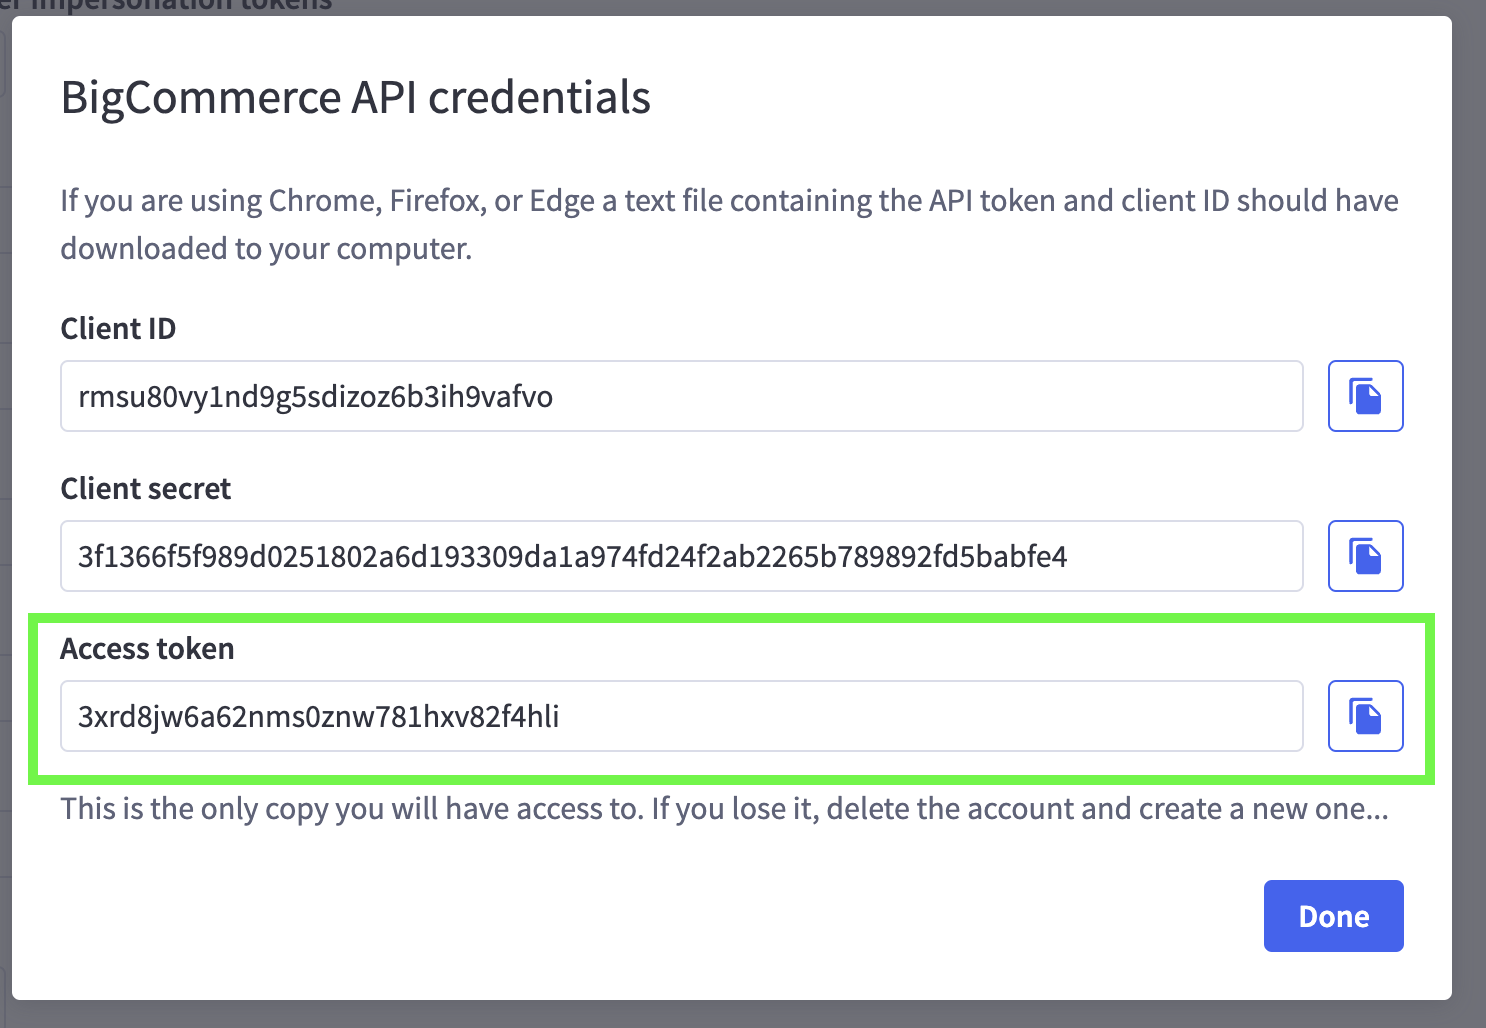
You should now see the generated BigCommerce API Credentials. Save the Access Token. You can use the clipboard icon to easily copy credentials.
-
Click on Done and verify that the newly created account has all the required scopes.

Step 2: Fill BigCommerce Information in Bolt Merchant Dashboard
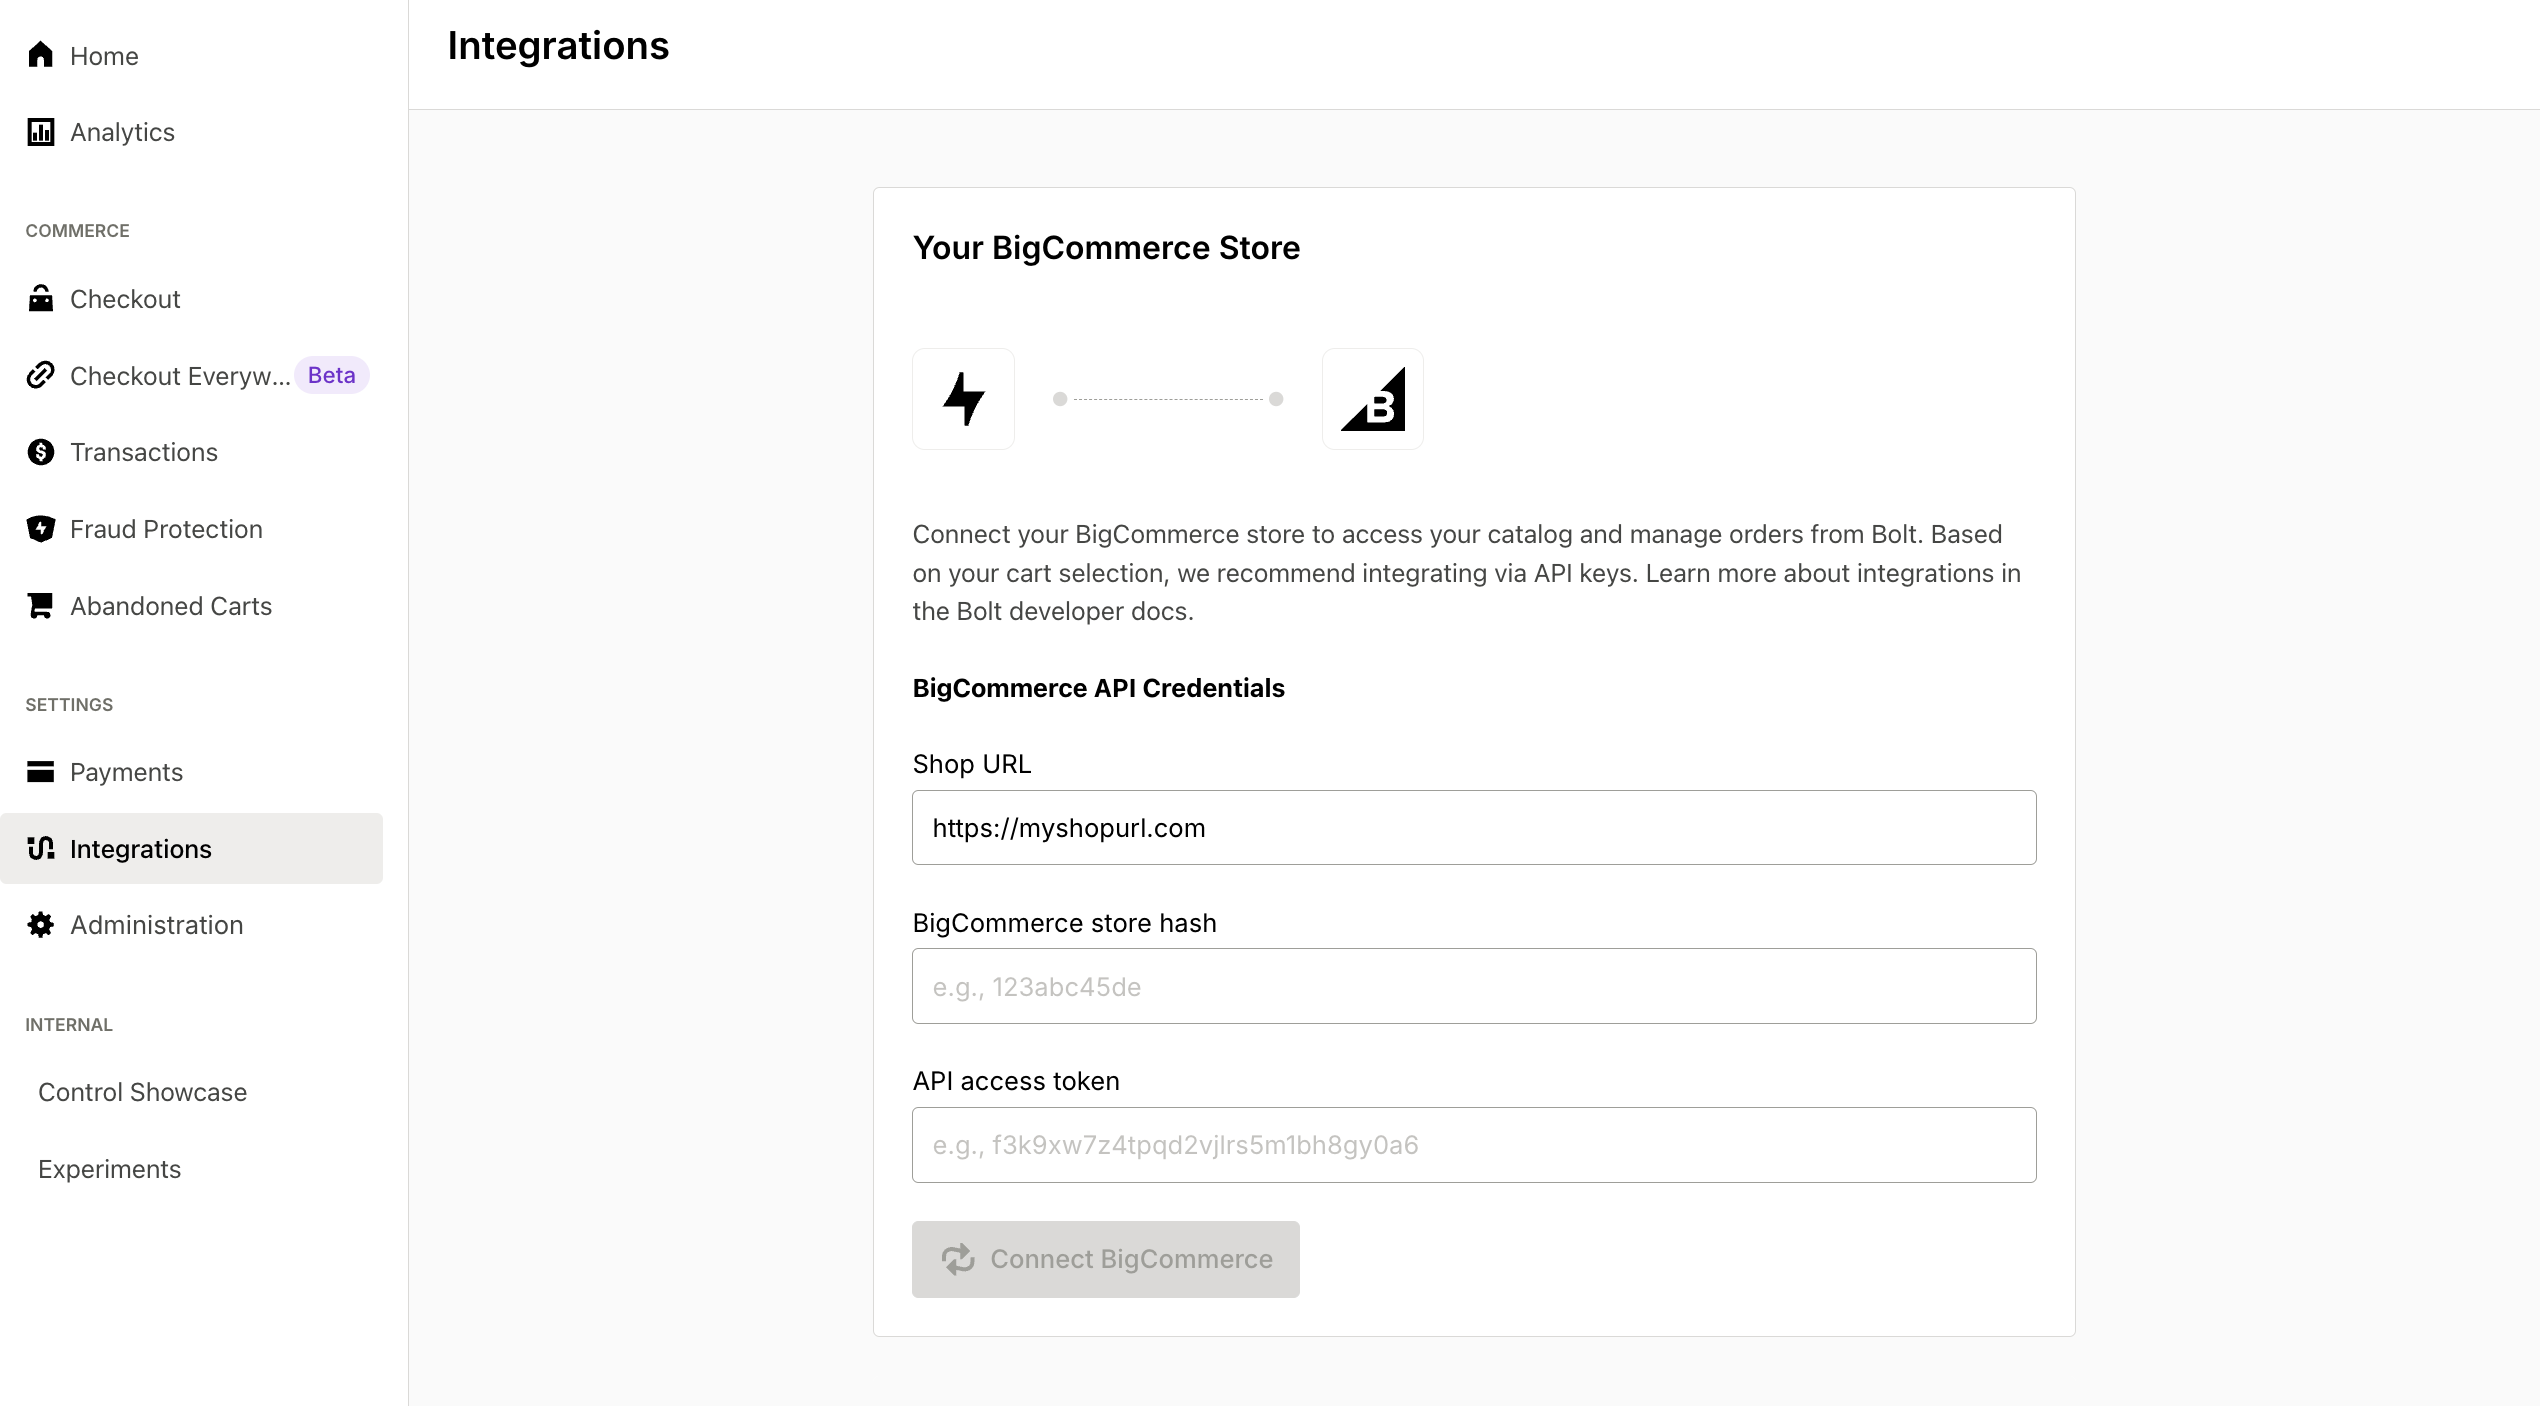
- Go to the Bolt Merchant Dashboard. Go to Integrations and select BigCommerce.
- Enter your store’s hash, and the Admin API access token for the account you created.
- Click Connect BigCommerce. You will see your product catalog count increase as the stores successfully connect.
Step 3: Set Up Payment Processor
If you already have Bolt Checkout or Accounts, or Embeddable Checkout set up, you can skip this step. If you are new, follow the instructions in our Payment Processor articles to set up your specific payment processor.
Step 4: Configure Your Checkout
If you already have Bolt Checkout, Accounts, or Embeddable Checkout set up, you can skip this step. If you are new, follow the instructions listed below to configure your checkout:
- Enter store and support information.
- Add store logo.
- Other checkout settings as found in your dashboard.
Step 5: Create your Checkout Links
Go to the dashboard and follow the instructions found in our Create Checkout Links article to start using Checkout Everywhere.