About

Shopper Experience
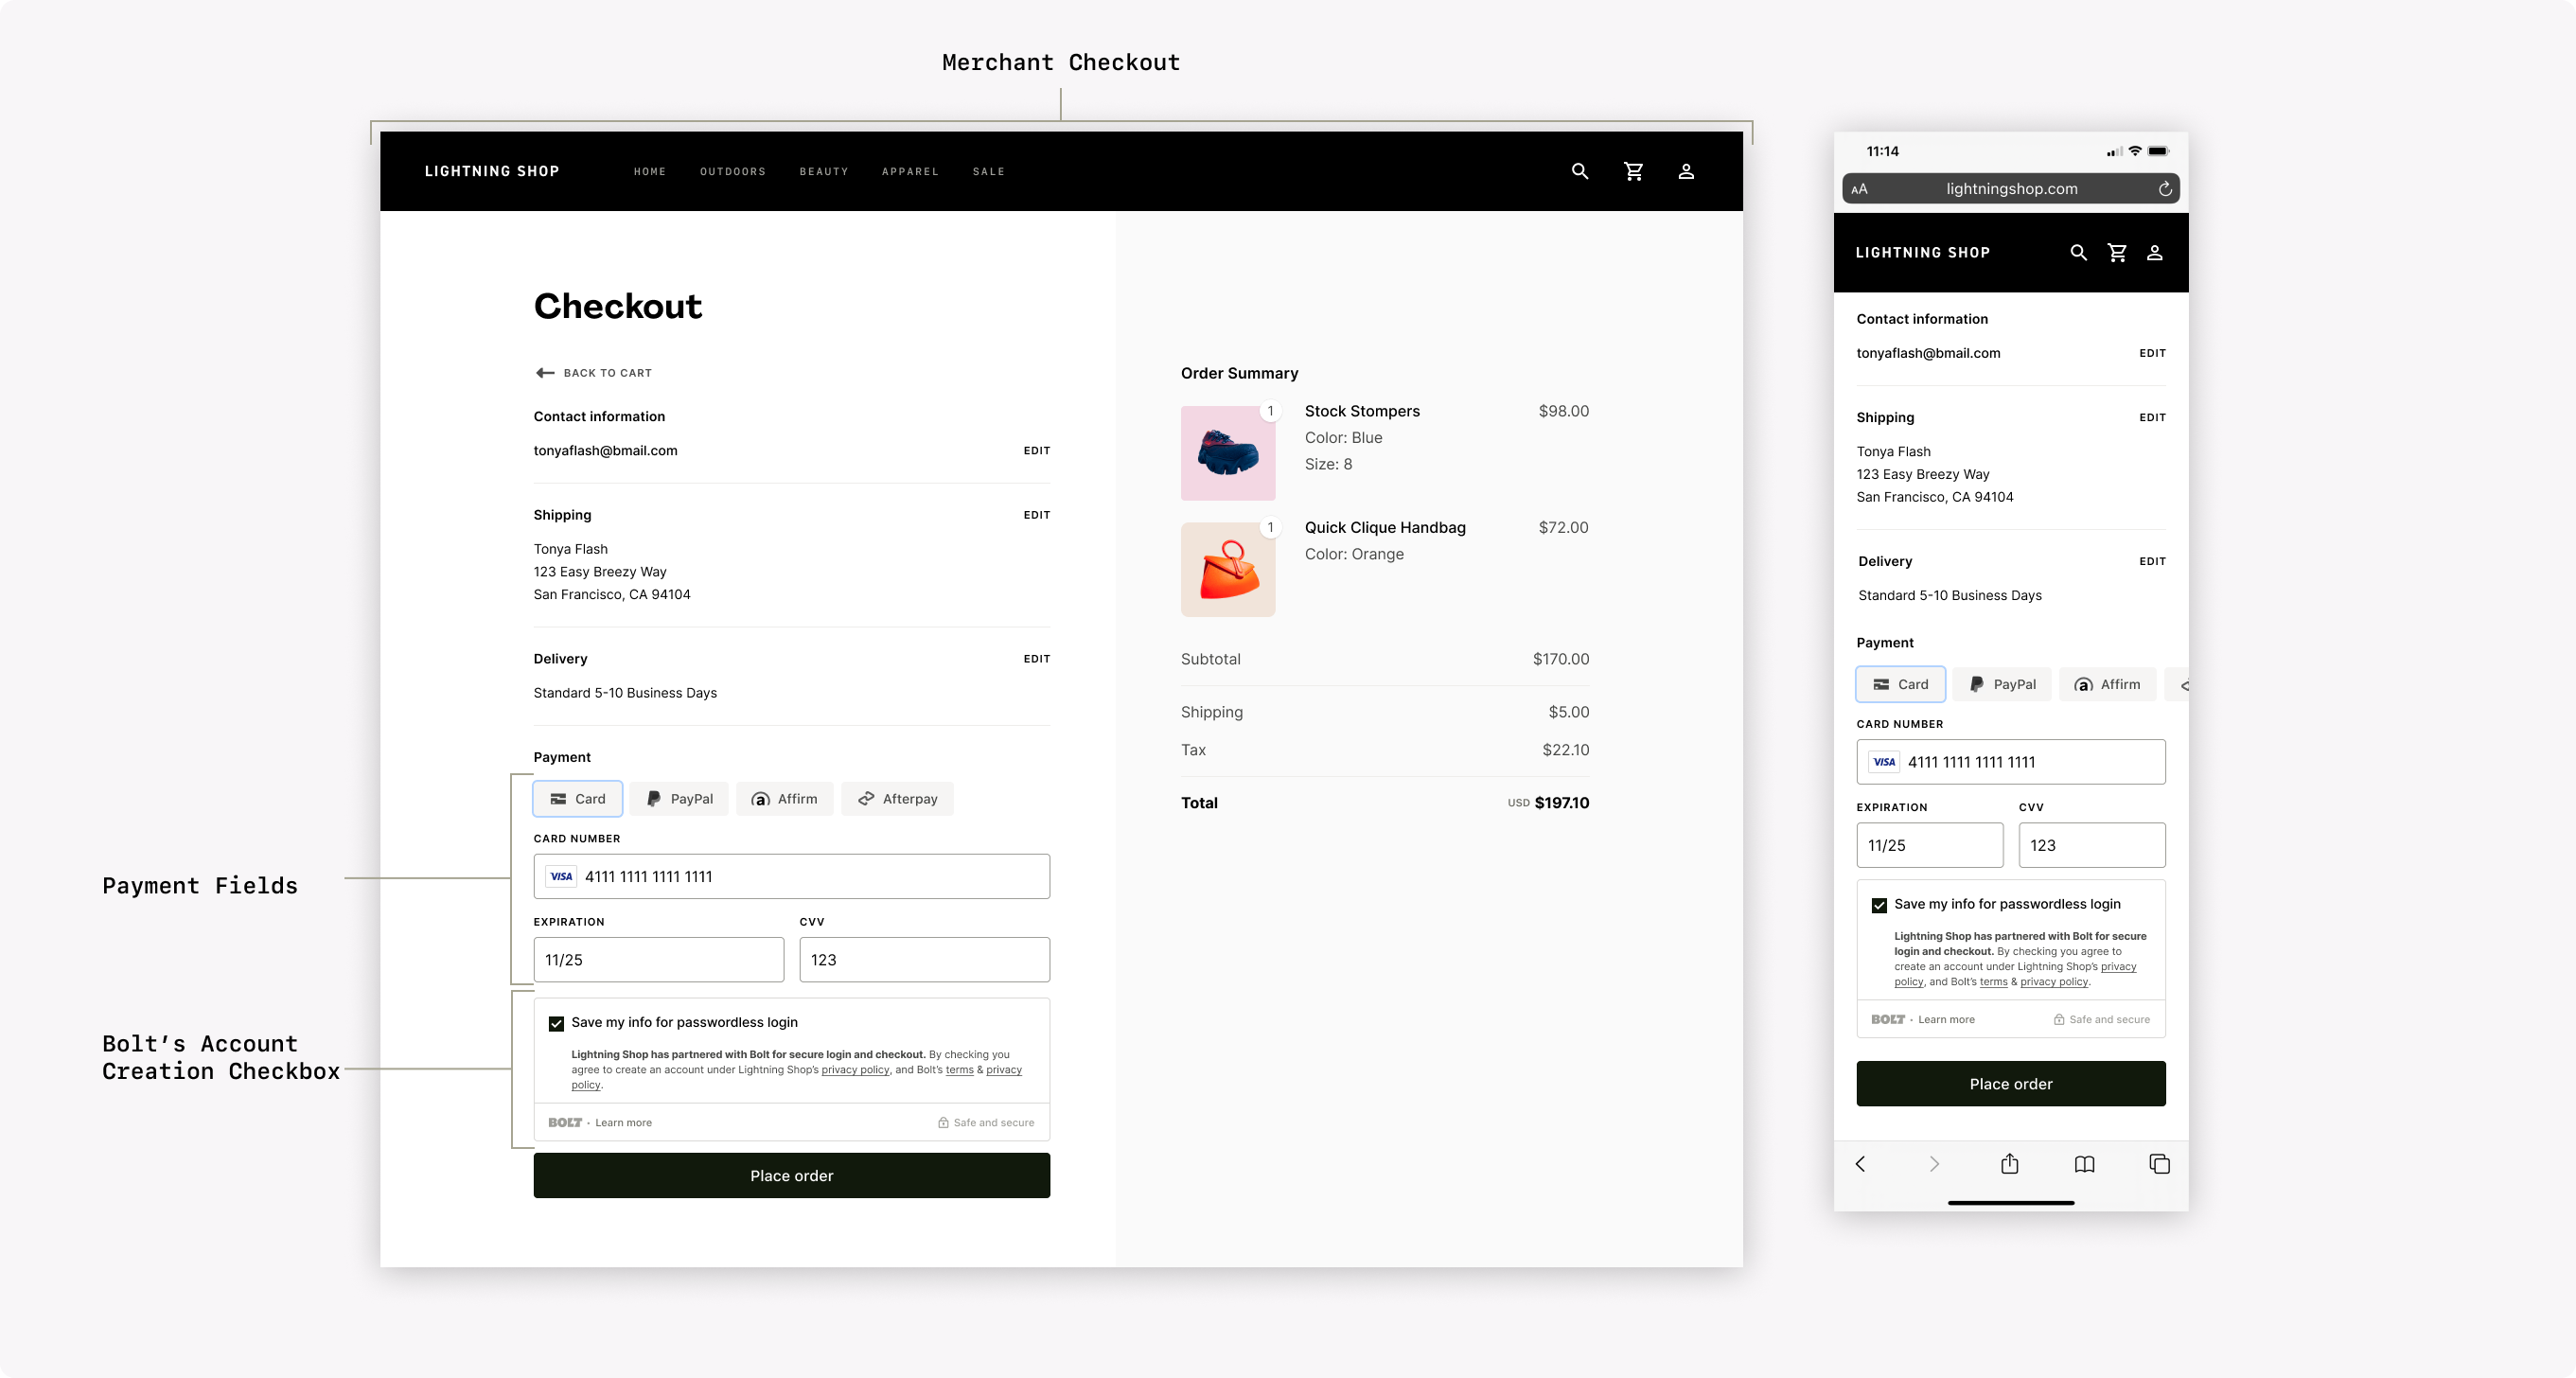
During checkout, shoppers without a pre-existing Bolt account have the option to opt out of creating one. Bolt provides an embedded component for collecting consent and displaying terms and conditions. This component is purely visual.

Interactions
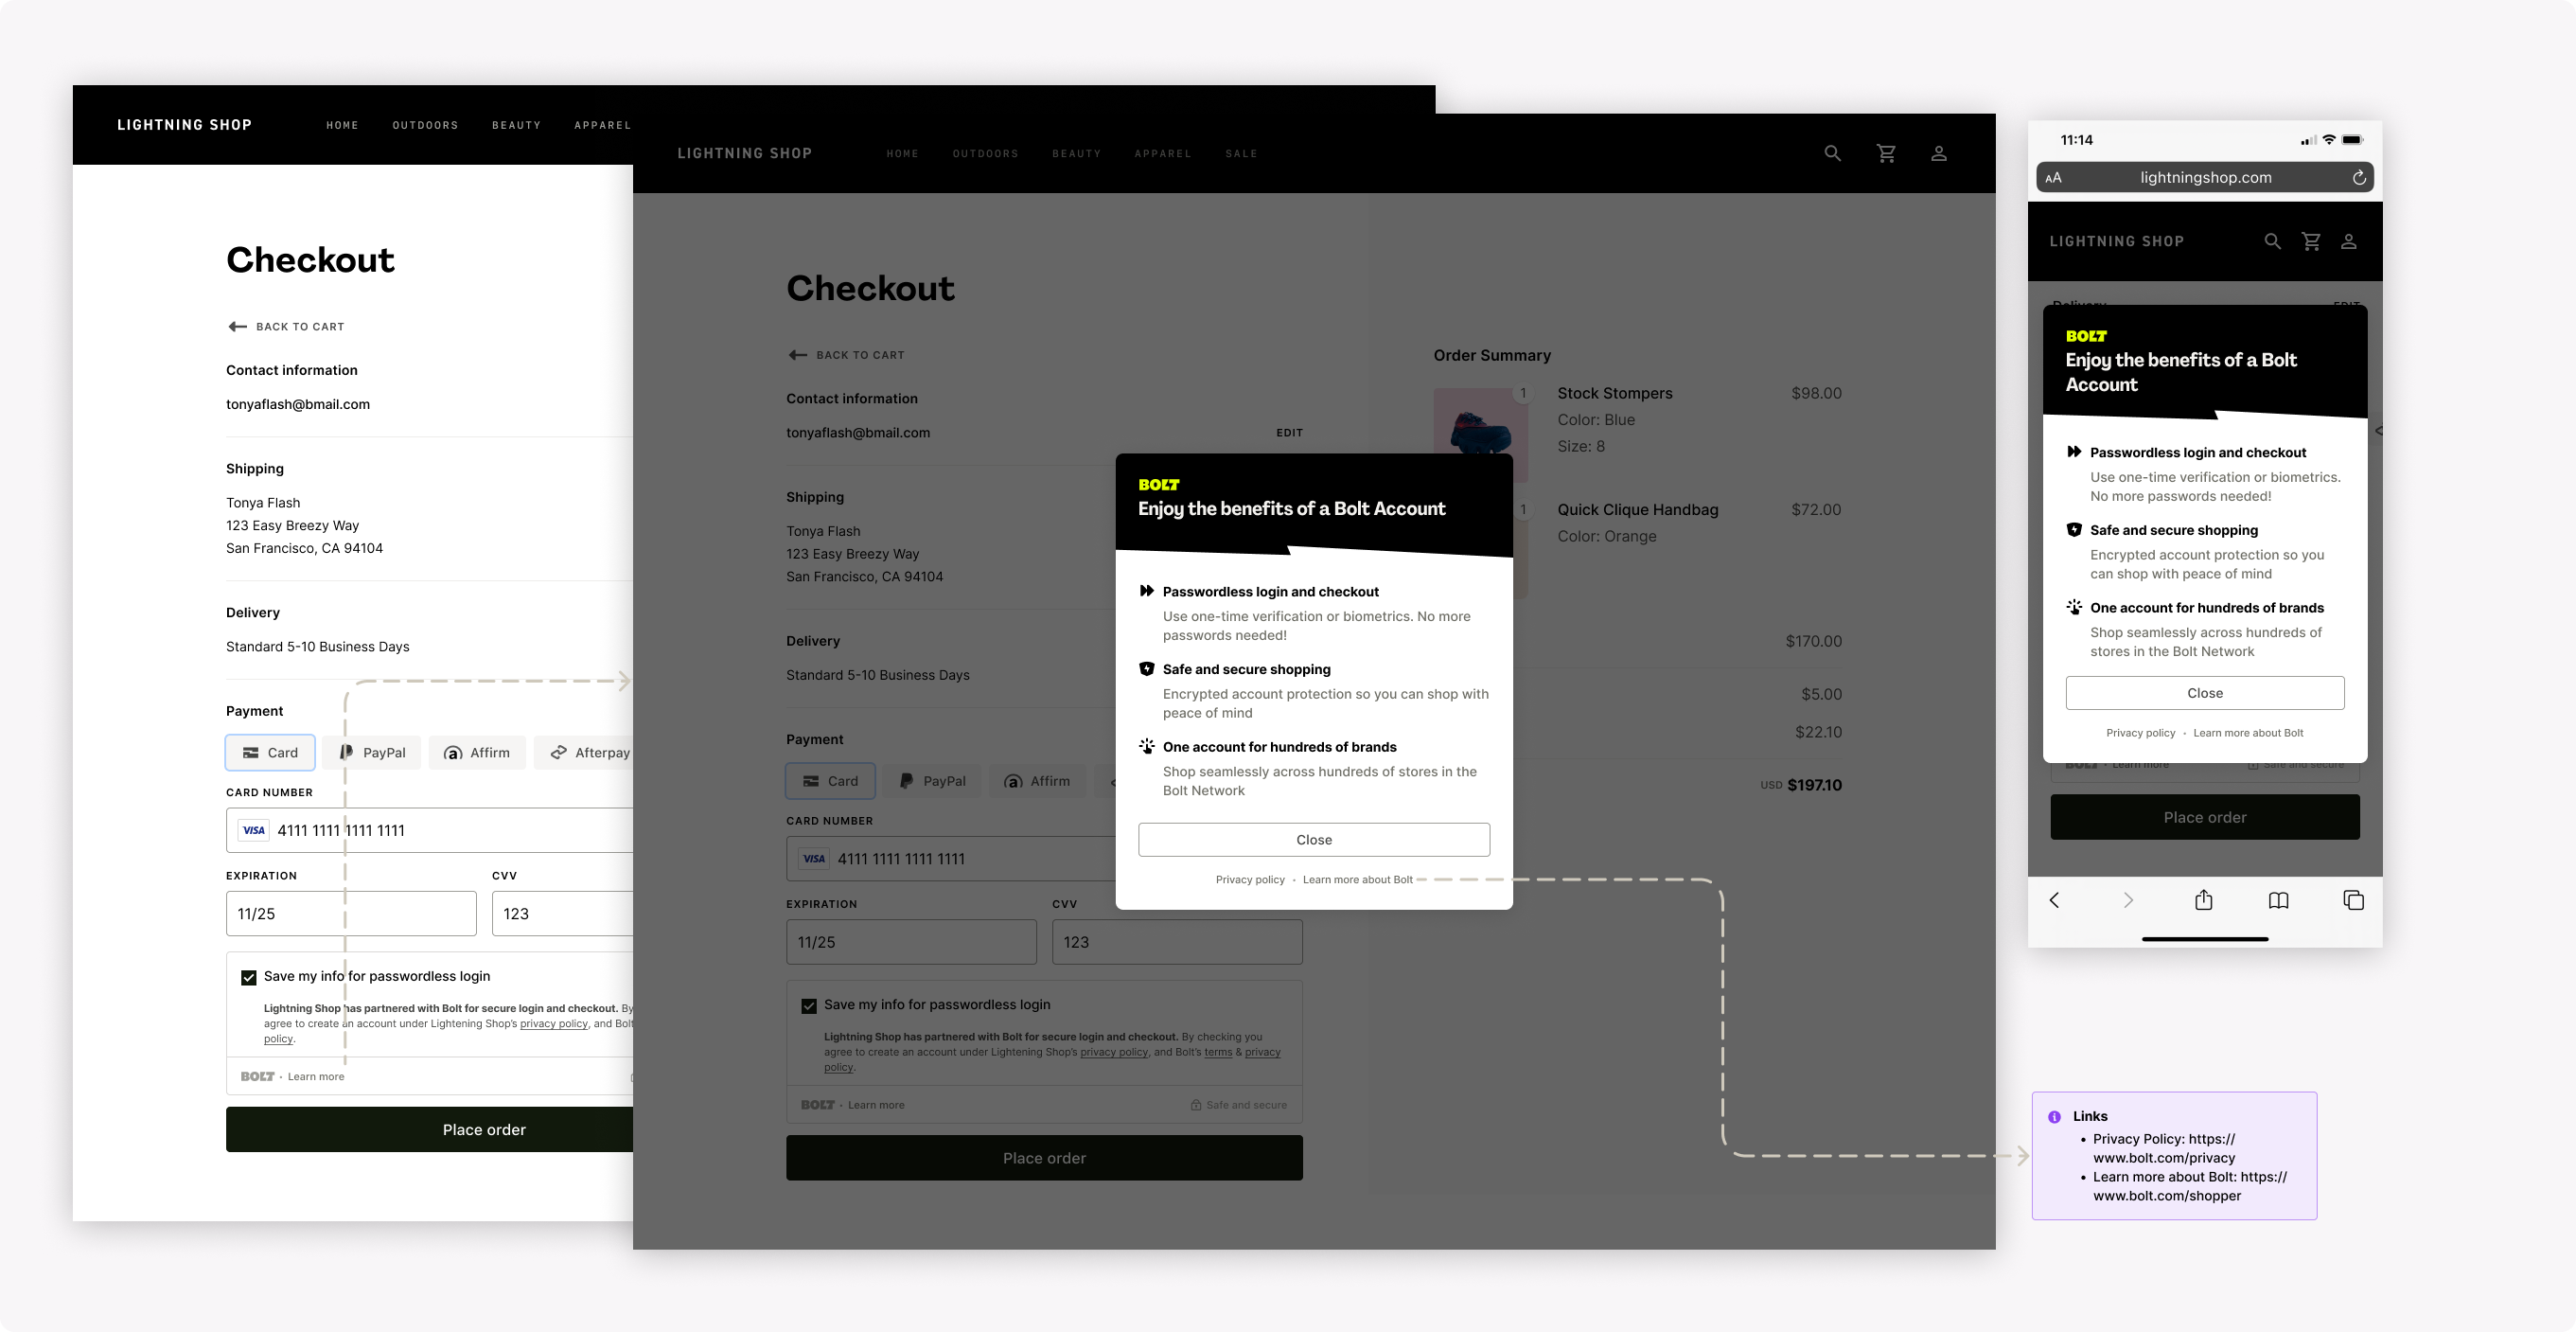
When shoppers click or tap on “Learn more”, the component produces an information modal with a brief explanation of the benefits of having a Bolt Account.

Placement & Styling
Placement
We recommend placing the checkbox after the Payment portion of your checkout. A/B tests have shown that to be the strongest variant in boosting account creation while adhering to shopper expectations.
State
The checkbox has to be defaulted to ‘Default On’ to maximize account creation and provide passwordless login to shoppers on their next visit.
Styling
We do not currently support merchant customizations for the Account Creation Checkbox component.
Implementation
Step 1: Create the Component
Create the checkbox by calling the create method on the Bolt client.
const accountCheckboxComponent = Bolt.create("account_checkbox", {
  webComponent: true,
});
RECOMMENDED
Be sure to include webComponent: true to ensure styling changes to your site will not impact the Account Checkbox component.
Customization Options
Options are not required and do not need to be passed. However, if you want to override the defaults, the options are:
interface Options {
  defaultValue?: boolean; // default false
  version?: "compact" | "expanded"; // default "compact"
  listeners?: {
    change?: (value: boolean) => void;
  };
}
Step 2: Mount the checkbox to your payment or review section:
accountCheckboxComponent.mount("#payment-section");
You can build logic to determine the visibility of the checkbox based on whether the shopper is signed into their Bolt account as well as whether their email address is already associated with a Bolt account. For example:
if (!hasBoltAccount && !loggedInToBolt) {
  accountCheckboxComponent.mount("#payment-section");
}
Step 3: Listen for Changes
You can do this either through the initialization configuration from the previous section (listeners), or anytime after initialization by using the component’s on method.
let createBoltAccount = false; // or what you set defaultValue to be

const unsubscribe = accountCheckboxComponent.on(
  "change",
  (checked) => (createBoltAccount = checked)
);
Step 4: Pass Checkbox Result to the Authorization Endpoint
When calling Bolt’s Authorize Payment API, pass the value in create_bolt_account as part of the request object.
Step 5: Unmount Account Checkbox (Optional)
To remove the component from the DOM, call the unmount function on the component instance.
accountCheckboxComponent.unmount();
